Table Tennis Scoreboard

Simple table tennis scoreboard operated with buttons mounted under the table. Indicates whose serve it is, plays a jingle when the game is over.
My fiancée and I got a table tennis table, and quickly found we are (read: I am) terrible at keeping score in our heads. I figured it would be a fun project to design a scoreboard.
When I made this, I felt quite well-versed in everything needed to build it, so it was a relaxing project to work on. The only thing particularly new to me was driving a piezo speaker. The speaker was a pretty late addition, added only because there was some left-over program memory on the microcontroller, and I felt a happy jingle would really rub it in for the loser. ;-)
Features
- Arcade-style buttons mounted under the table on each side, pressed to give add a point to that side
- 4-digit 7-segment display indicating score in the current game
- Button to toggle display between current game score, number of games won since powerup, and total number of games won (stored in EEPROM)
- Reset function to clear games won since powerup, or all time
- LEDs indicating whose turn it is to serve
- “Undo” function by pressing and holding a player’s button, if the player mistakenly gave themself a point
- “Swap sides” function by pressing and holding both player buttons (swaps scores in all 3 counters)
- Audio feedback for button press, long press
- Game over jingle when a player wins the game
- 11 Point game with 2 points difference win condition (or however many points it takes to get 2 points difference beyond 11)
- Powered via micro-usb connection
The device is built around the lightweight Microchip ATTiny84 microcontroller and Maxim Integrated MAX7219 display driver, which also drives 5 indication LEDs. I managed to fill up virtually all of the program memory; I had to optimize the code a bit to make it all fit after adding the audio portion of the firmware.
Work Involved
- Circuit design / breadboarding prototype
- Firmware development (plain AVR-C, built with a Makefile, avr-gcc, flashed with AVRDUDE)
- Schematic capture (KiCad)
- PCB design (KiCad)
- PCB assembly (through-hole soldering)
- 3D-printable case design (FreeCAD)
- 3D-Printable button case design (FreeCAD)
- Wiring and assembly of button units
Additional Images
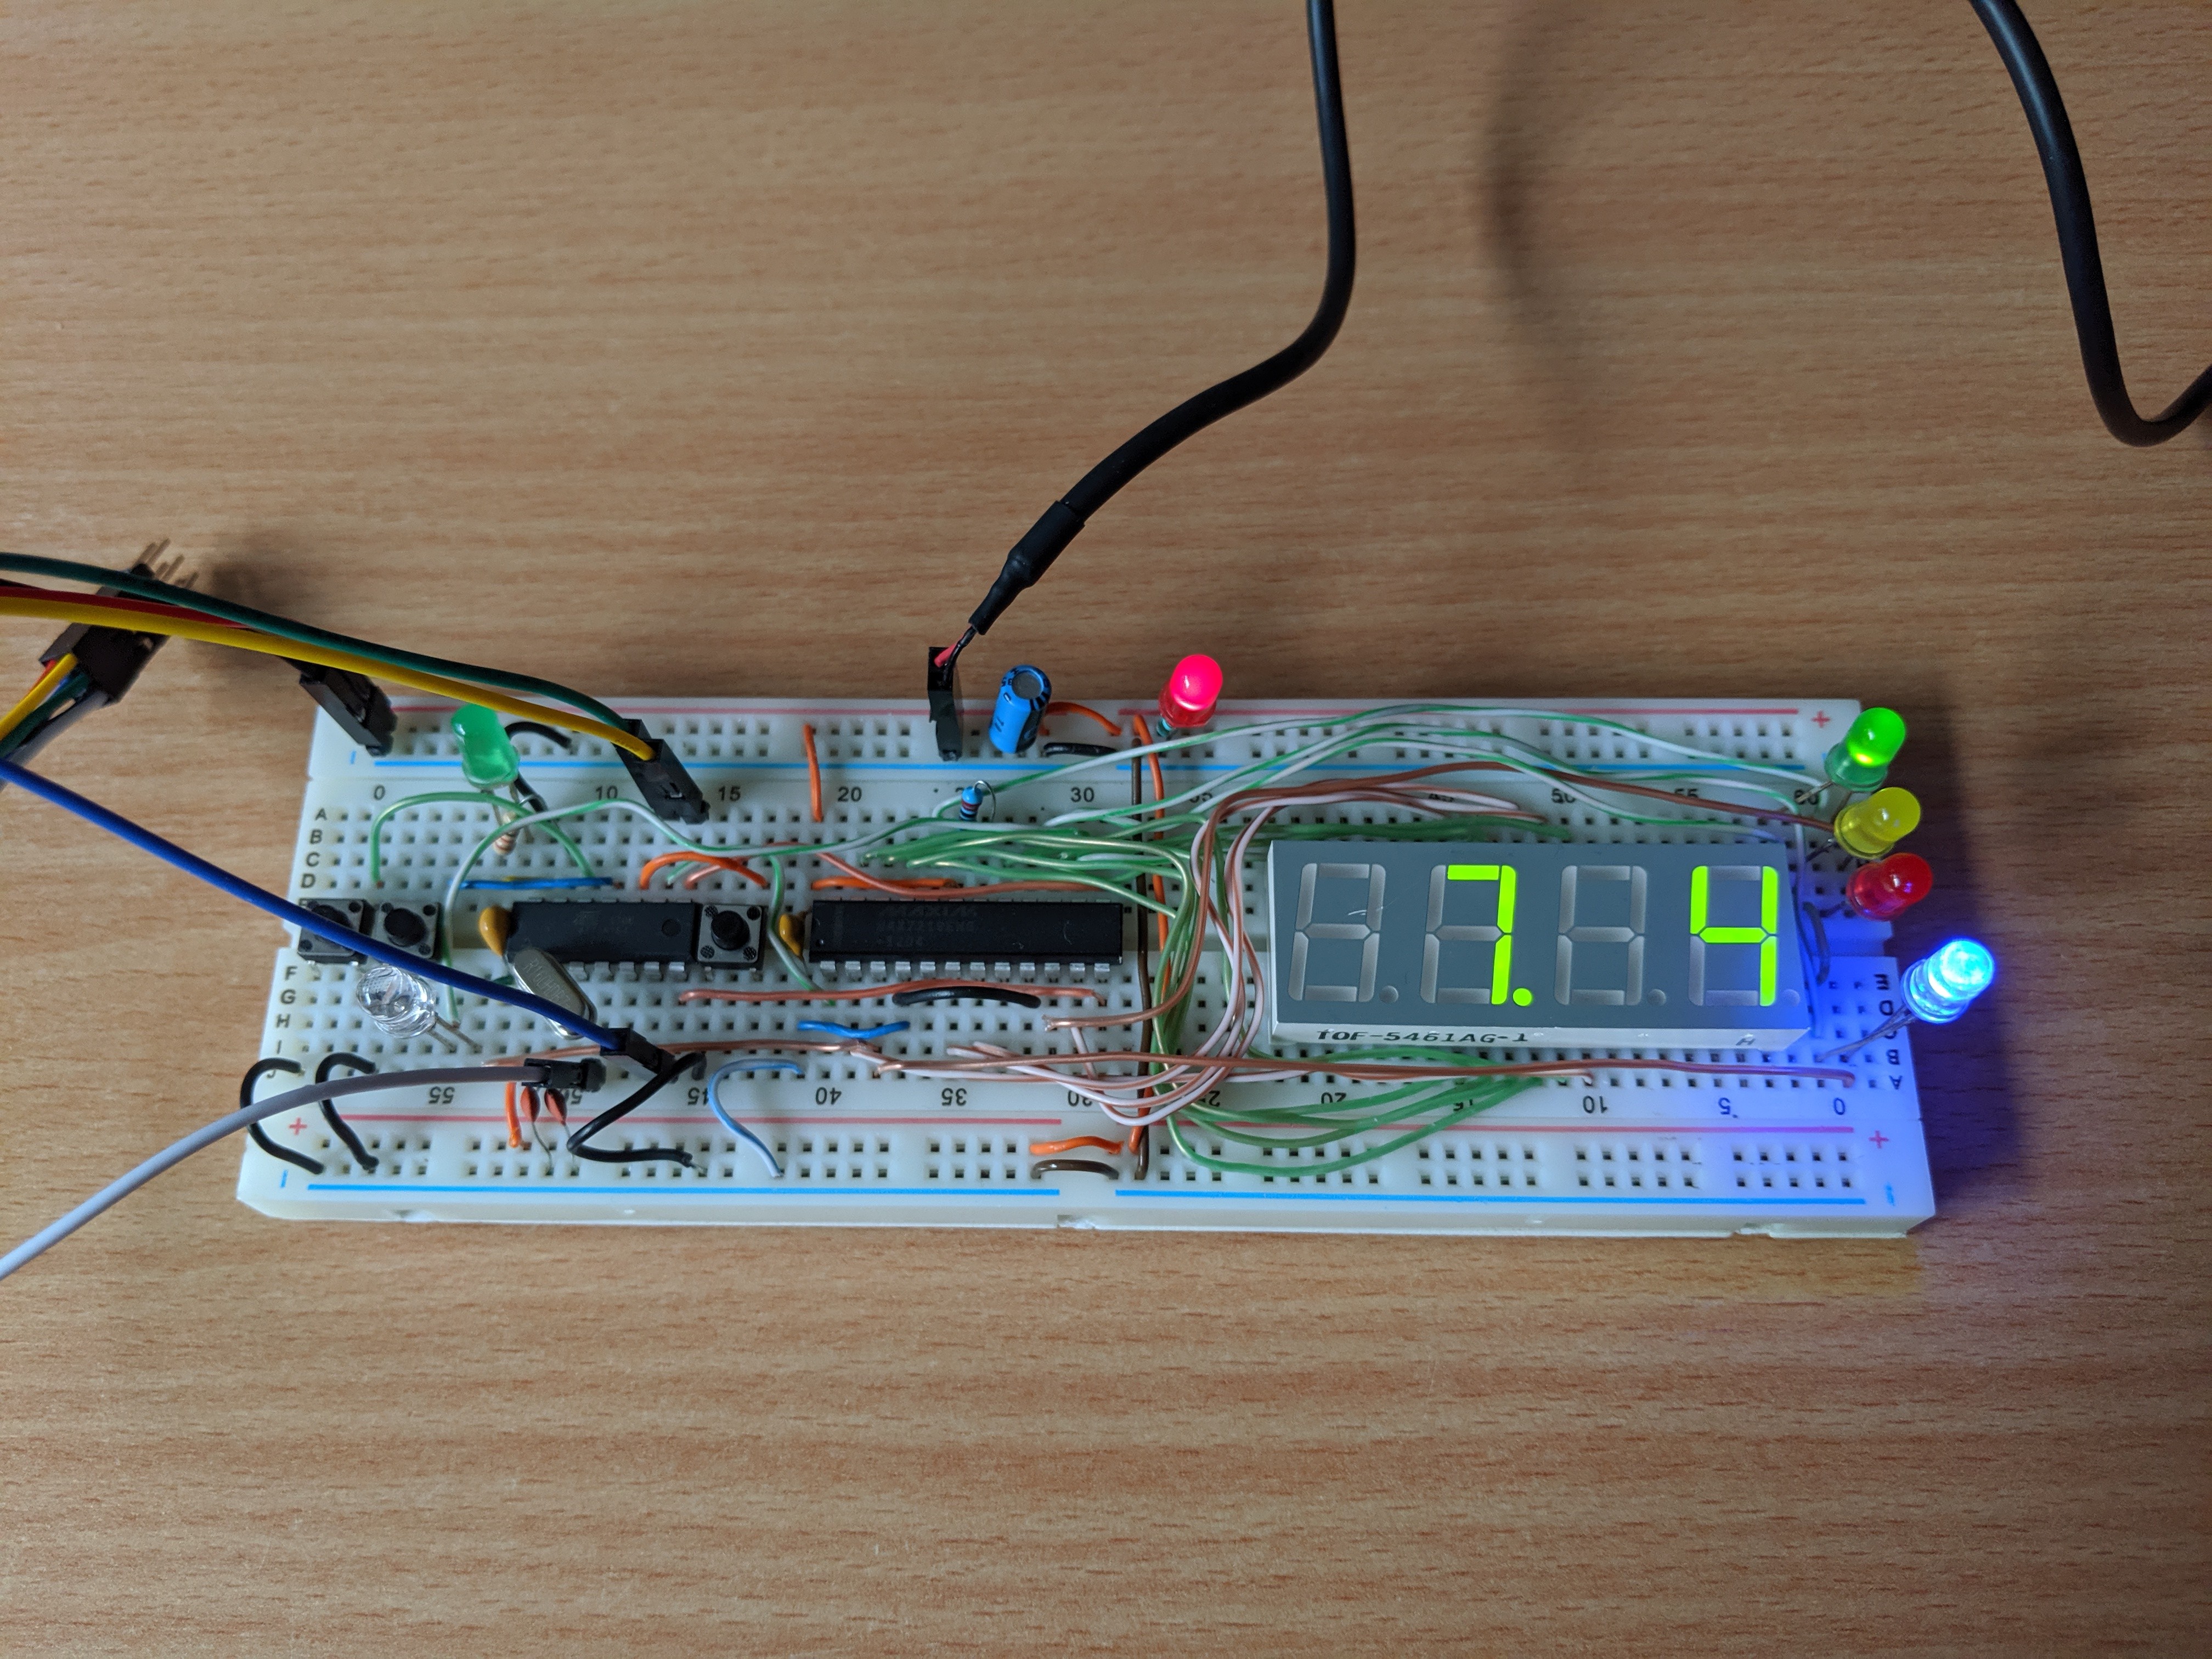
The breadboarded prototype, simple enough to fit on a small breadboard:
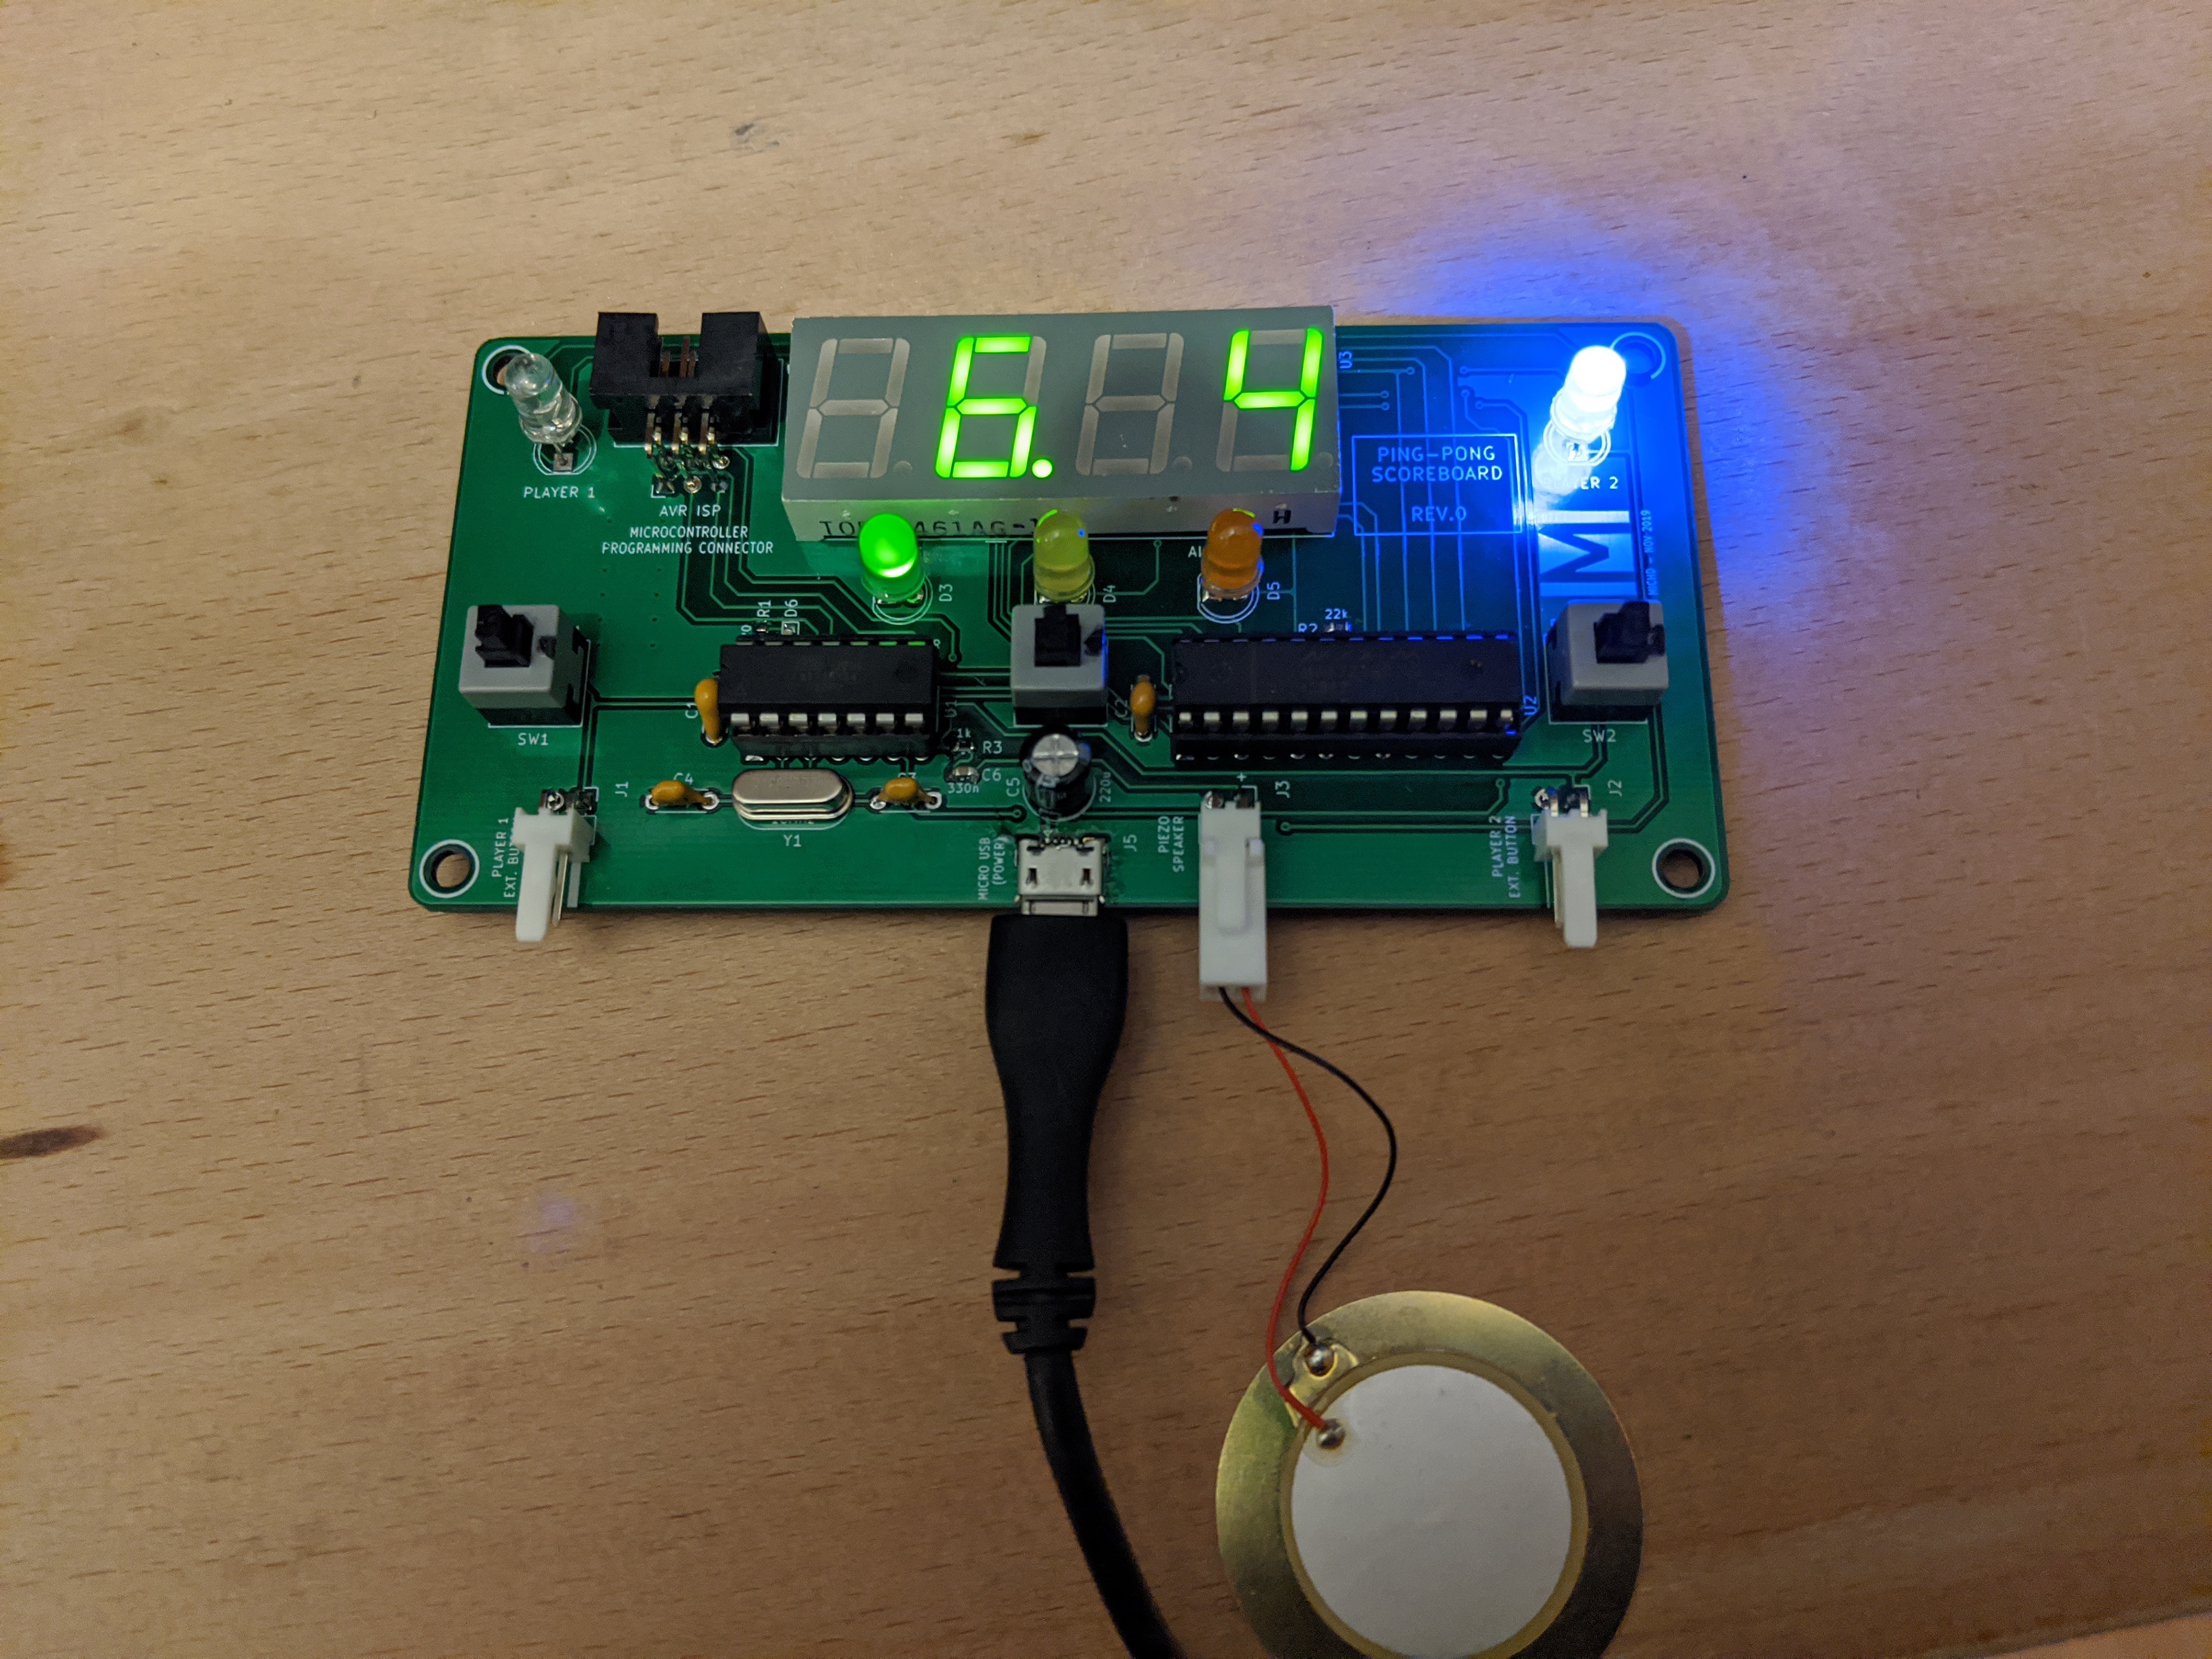
The finished PCB, powered up:
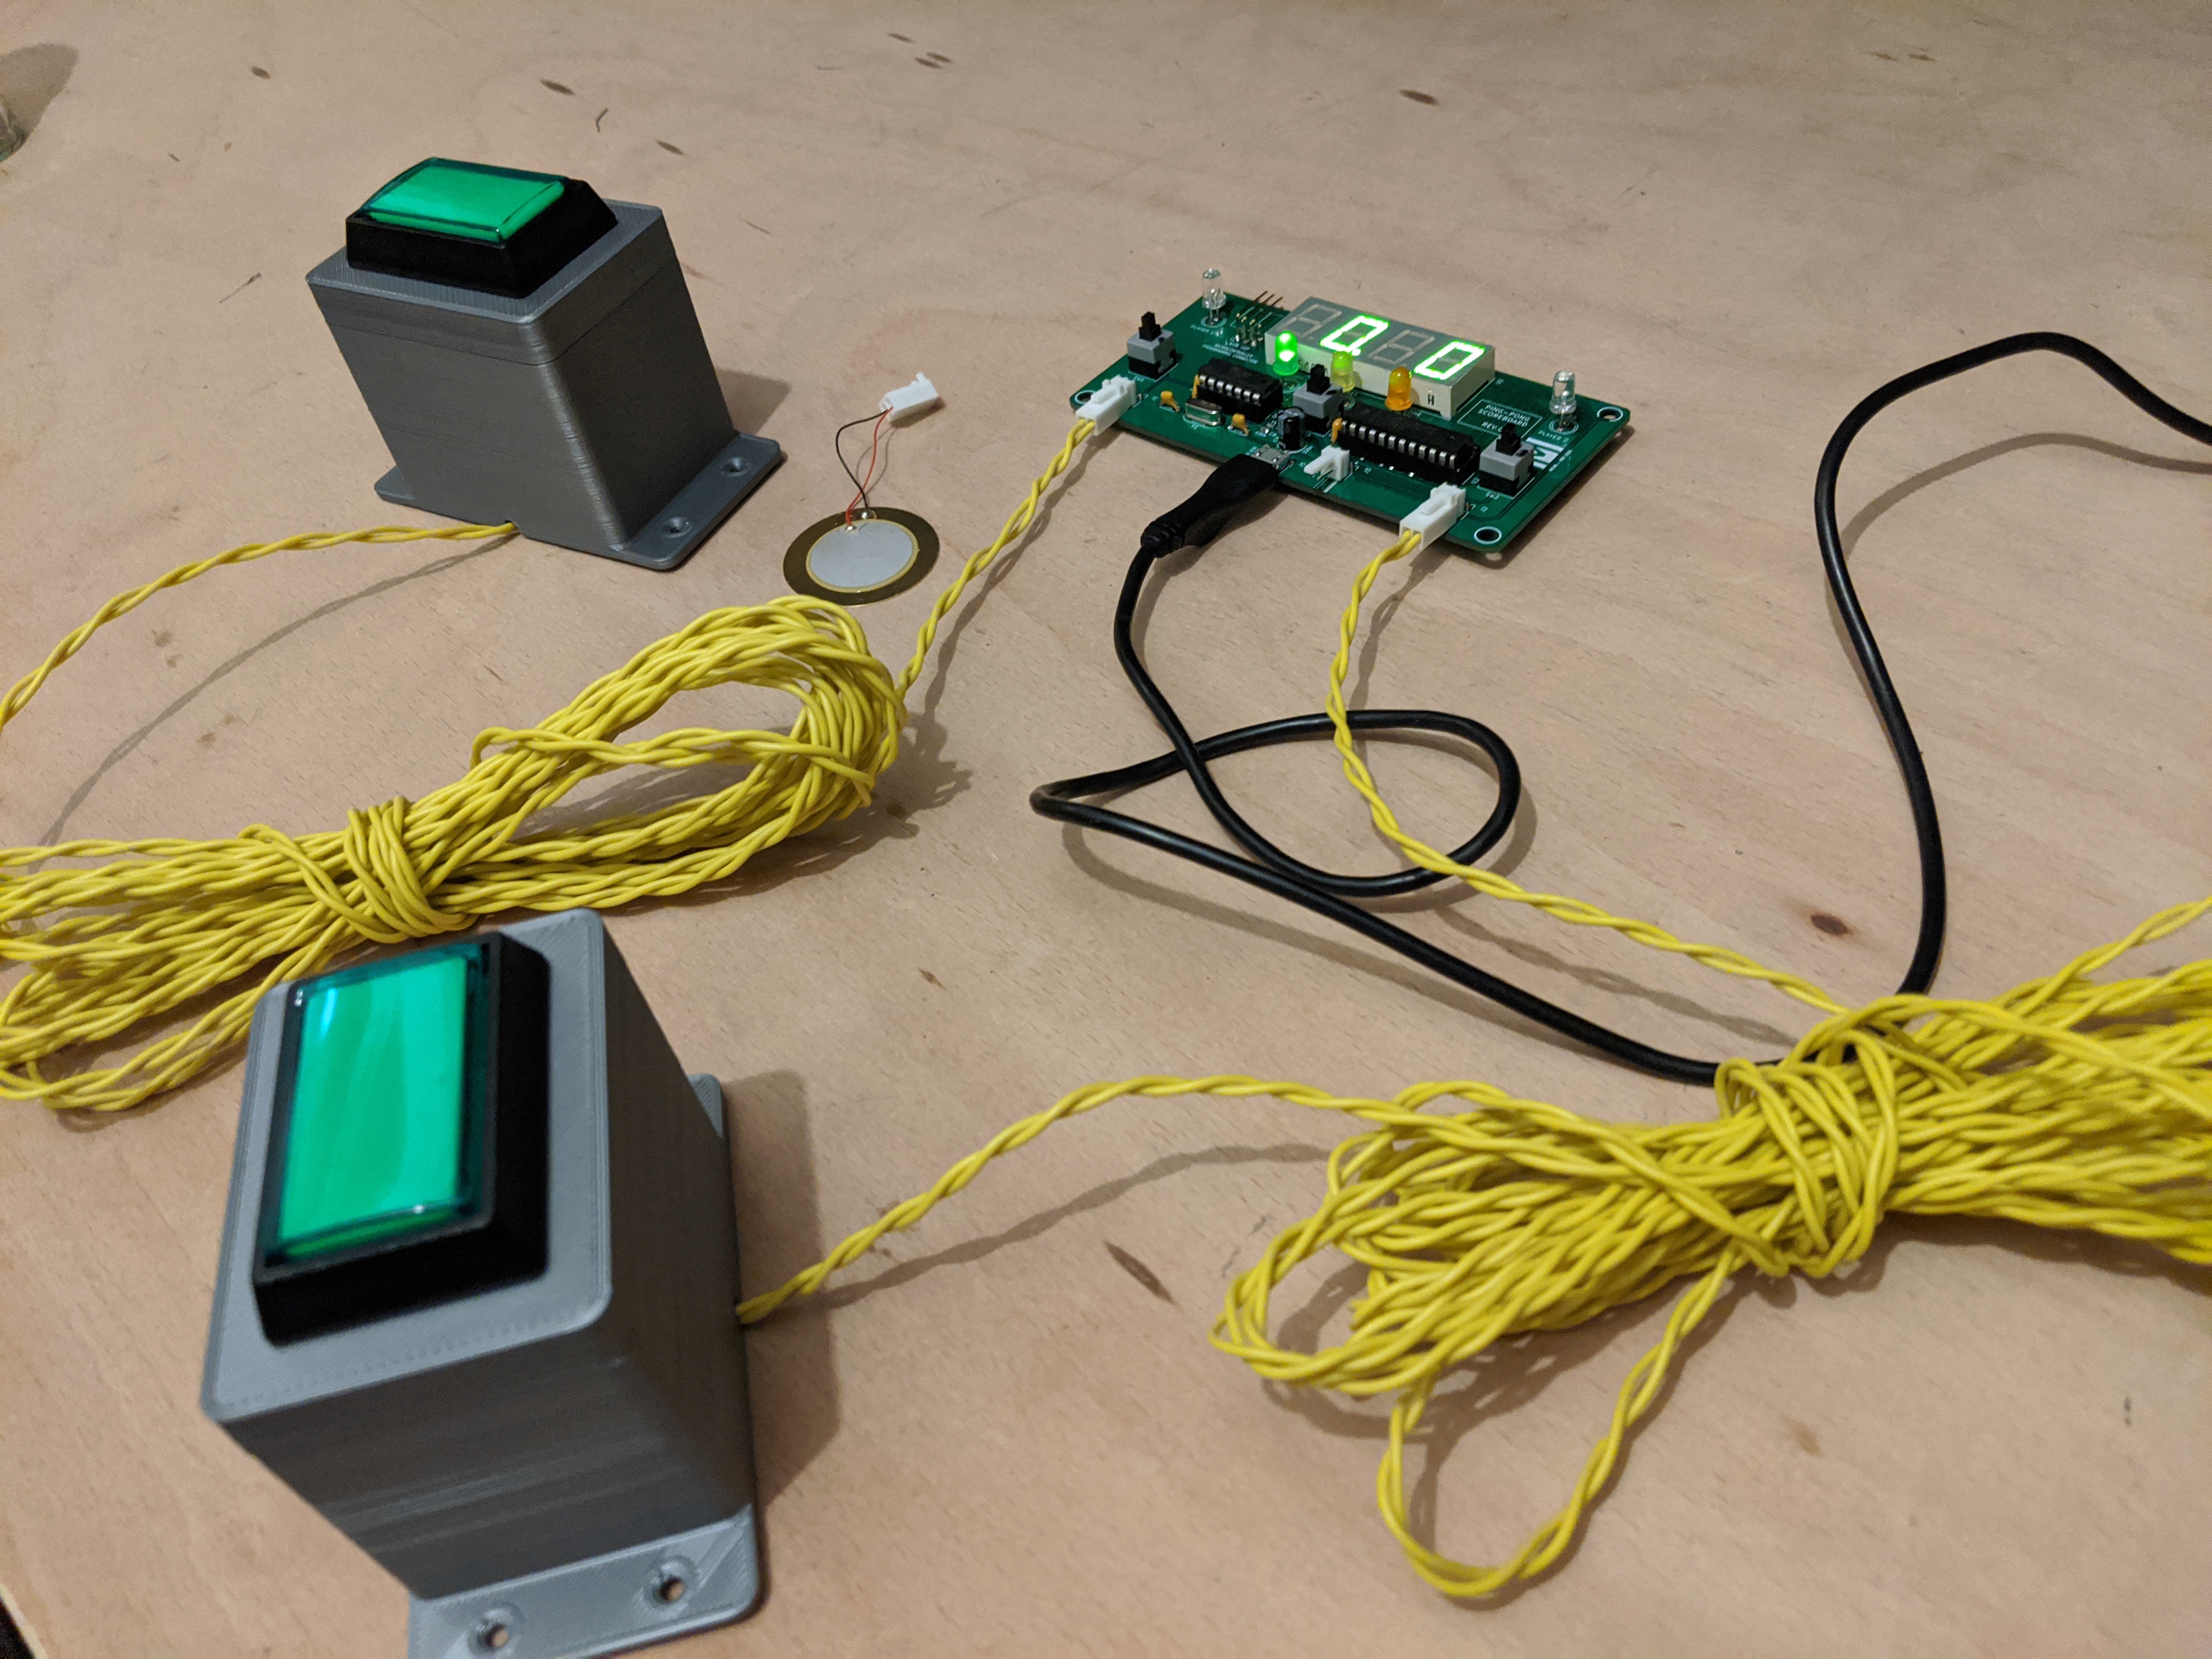
Board, and buttons in their 3D printed cases:
Circuit/PCB designs and firmware code can be found on GitHub: pingpong-scoreboard